
Chestnut Hill Powder Room Floor Tile: Before & After

Featured Project:
New Tile Flooring for this Chestnut Hill Powder Room
When a Chestnut Hill homeowner asked us to replace a tired wood floor with a modern, durable tile that tied in with their existing countertop, our team delivered a crisp makeover in just two days—on time, on budget, and built to last.
Project at a glance
Location: Chestnut Hill, PA (Philadelphia)
Room: Powder room
Timeline: 2 days
Goal: Remove wood, install porcelain tile that complements the existing countertop
Challenge: Very tight space that required precise layout and cuts
Result: Seamless, low-maintenance floor with a clean, modern feel
Materials We Used (and why)
✔ 24×24 Porcelain Floor Tile — large-format panels visually open up a small room and minimize grout joints for easier upkeep.
✔ Cement Board Over Plywood (glued and screwed) — creates a rigid, stable underlayment that resists movement and tile failure.
✔ Schluter® Thinset Mortar + MAPEI® Grout — industry-trusted products that support a long-lasting installation and color-true joints.
PRO TIP: In small baths and powder rooms, large-format porcelain with tight grout joints (1/16"–1/8") helps the floor read as one continuous surface—especially when grout is color-matched to the tile.
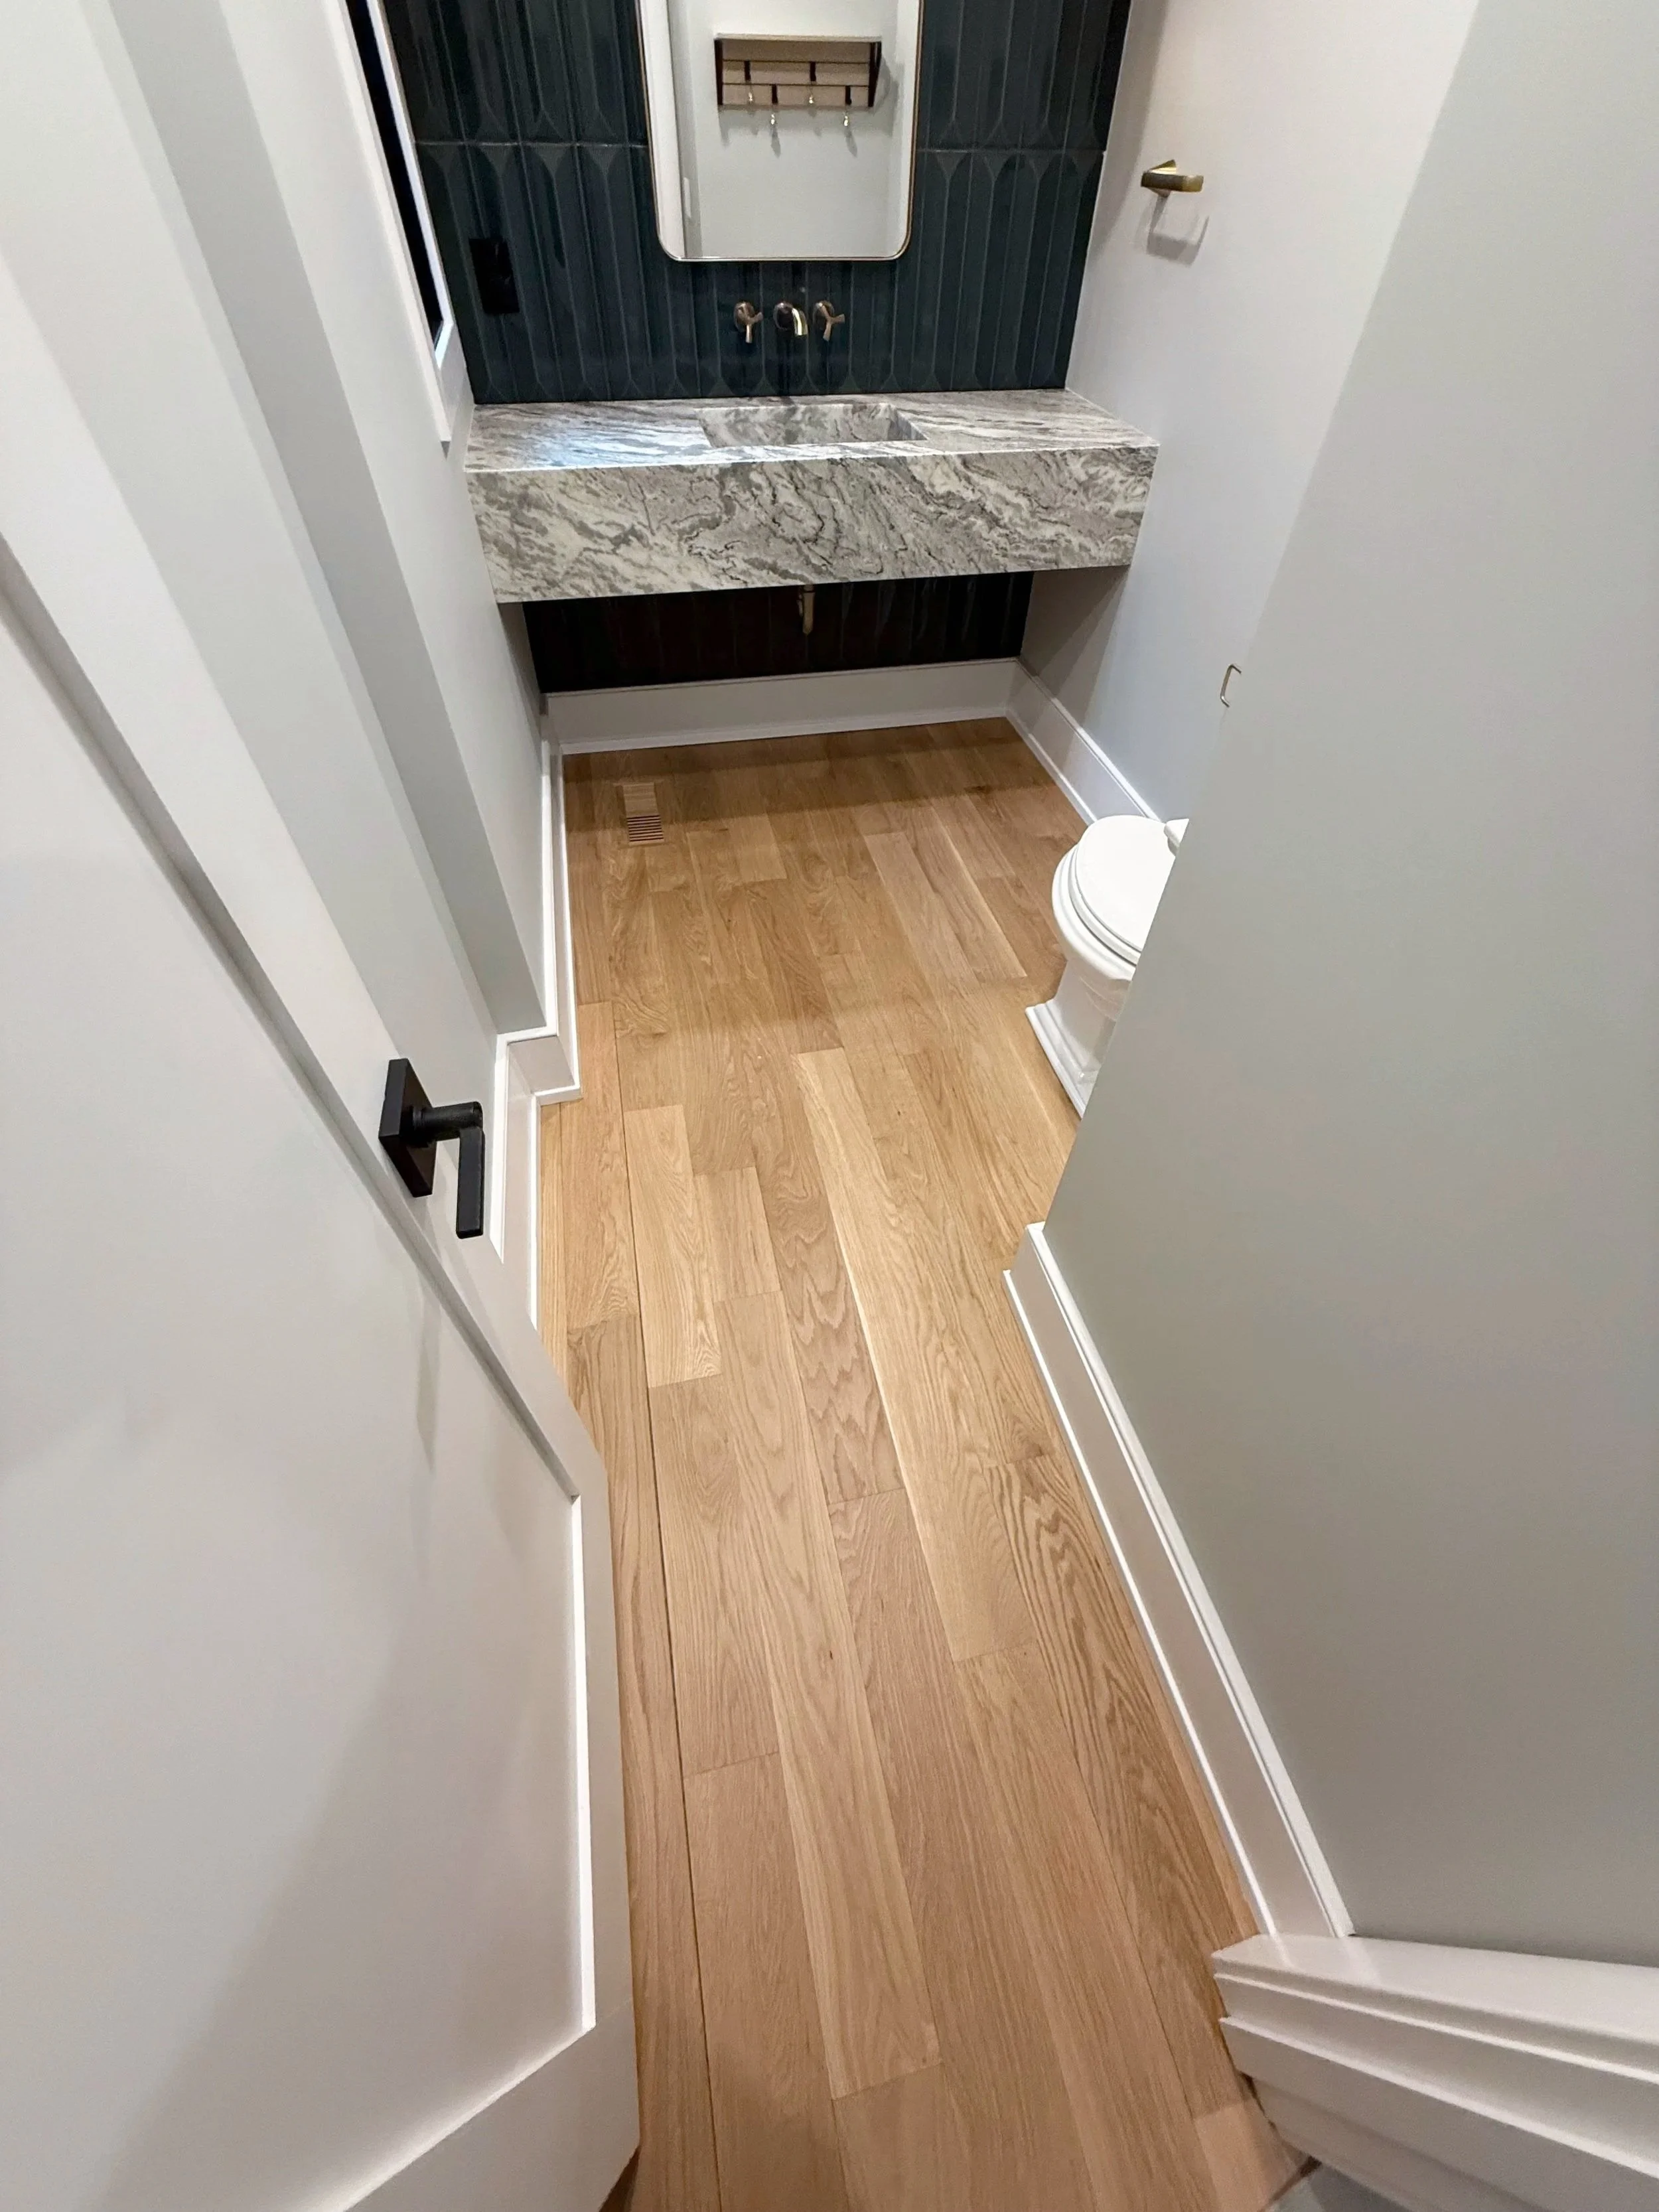
Before
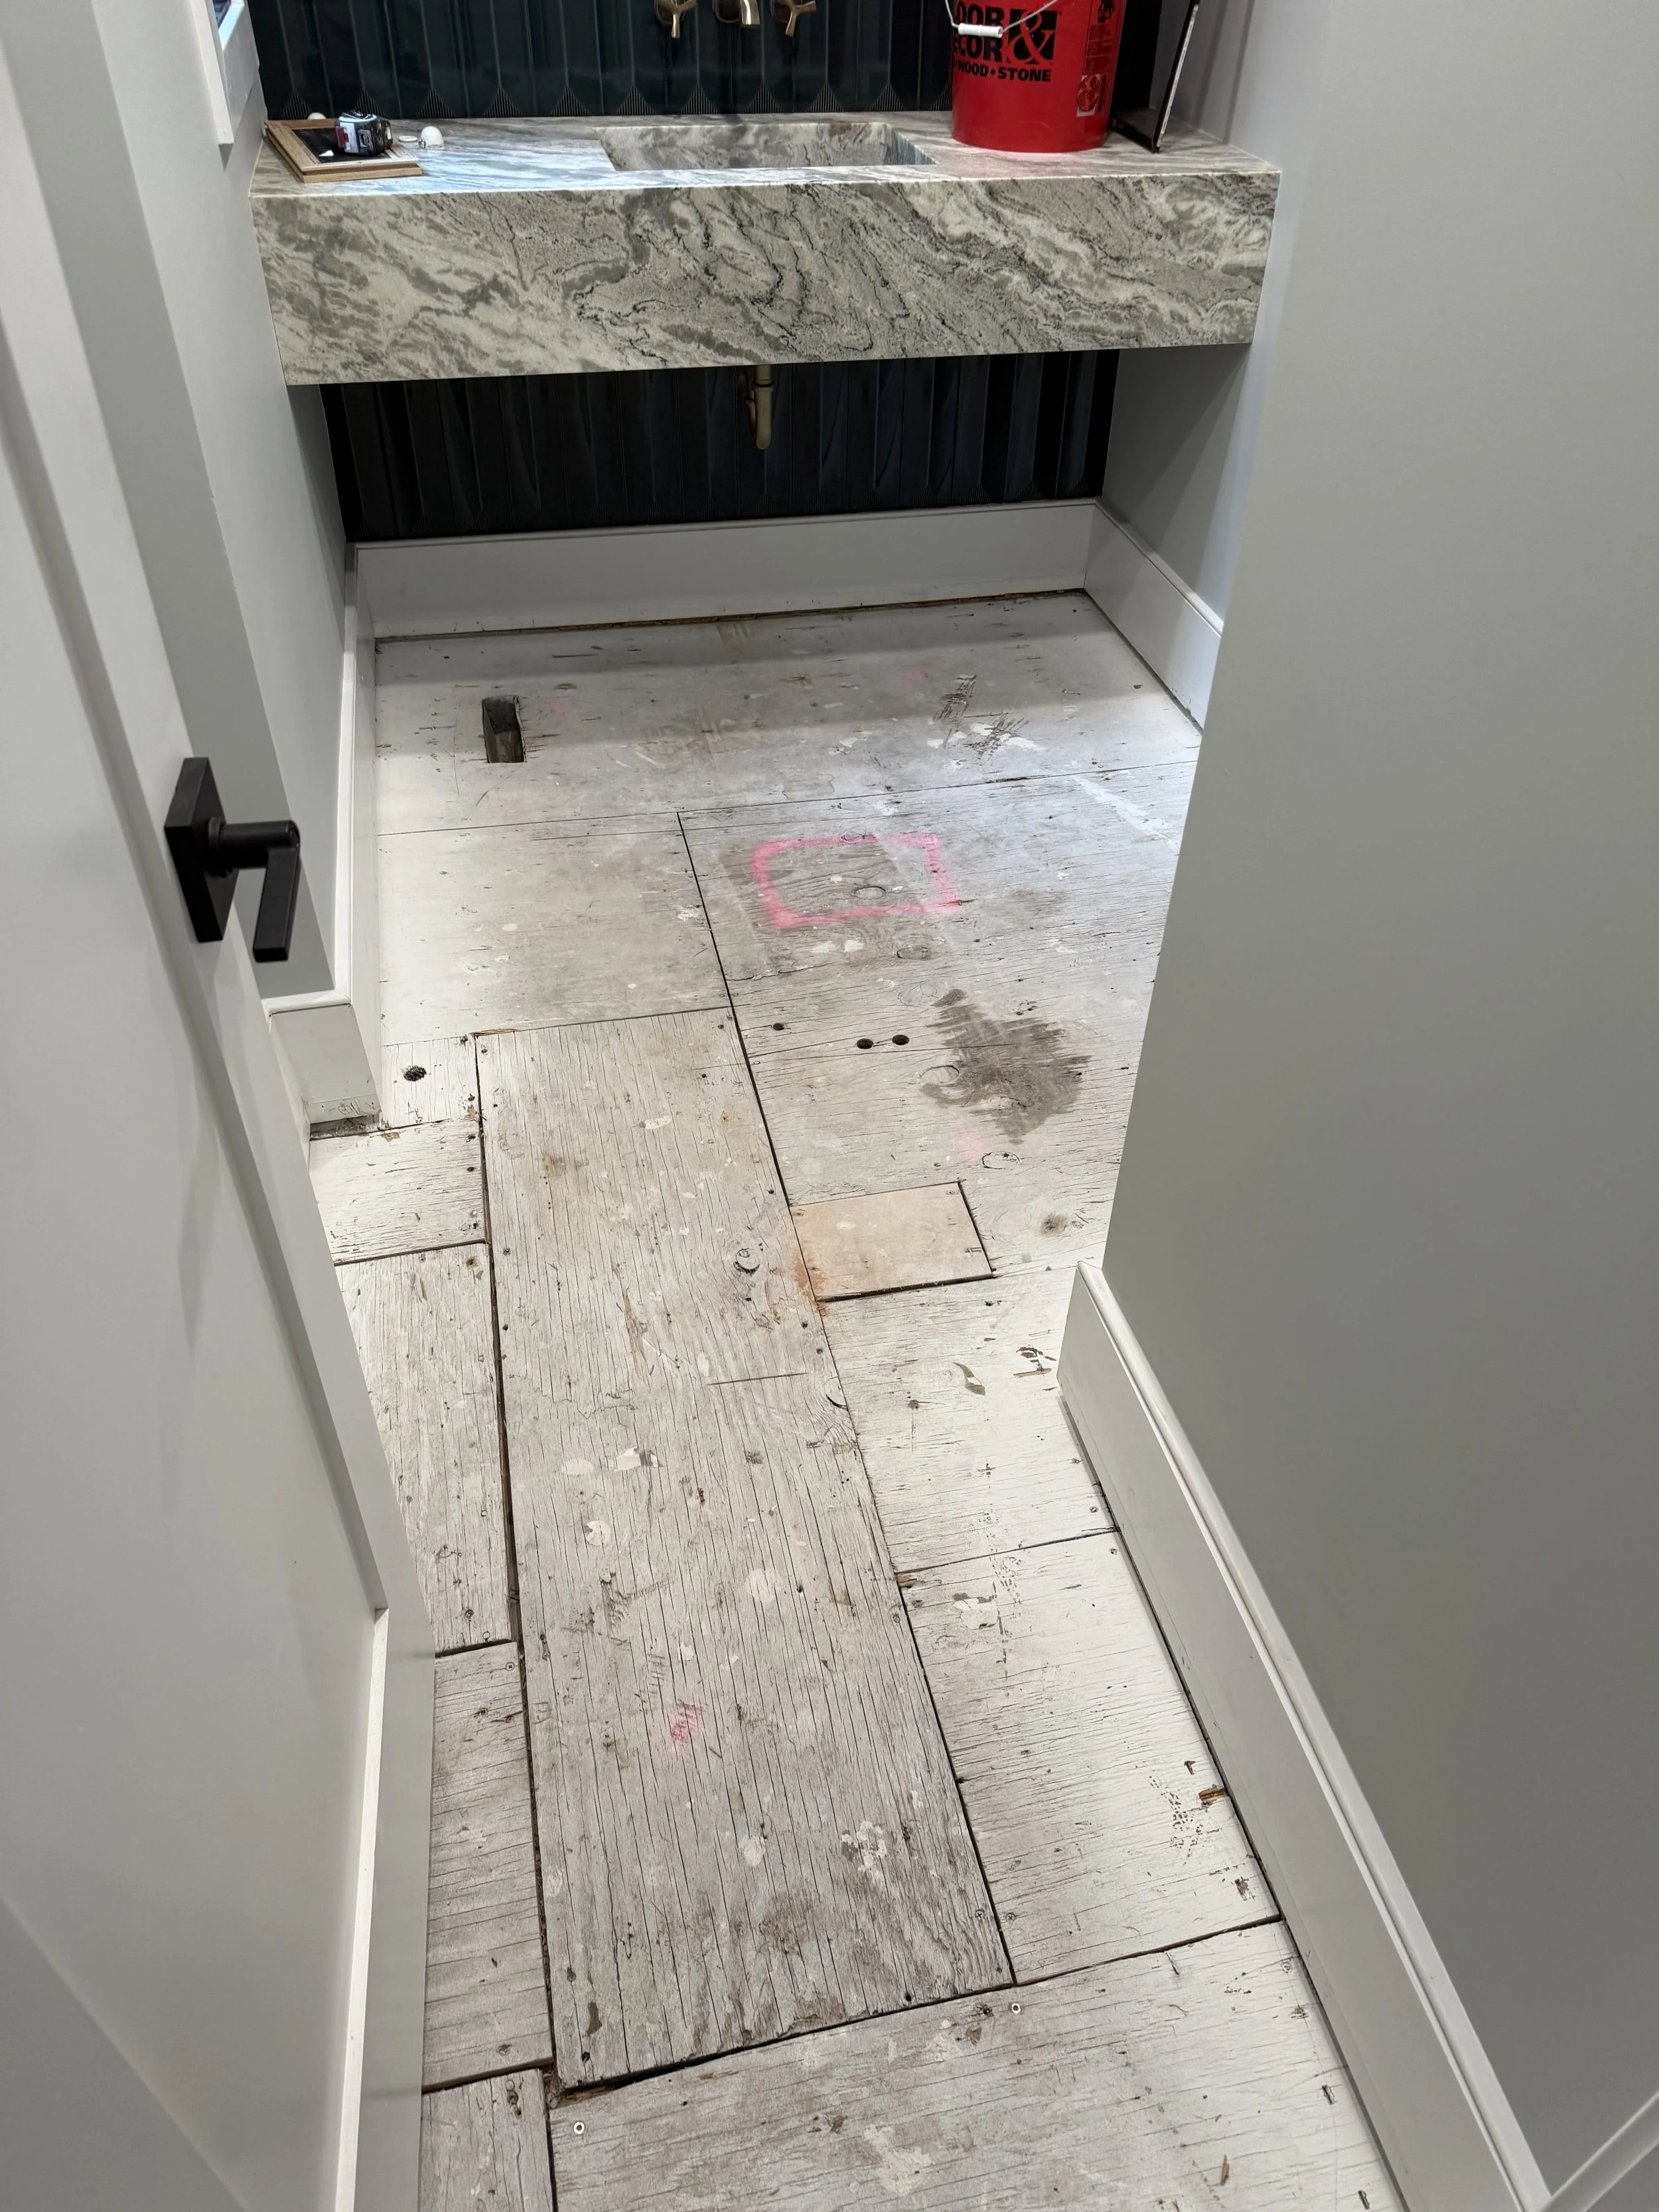
During
Our Step-by-Step Approach
Protect & Demo – We protected adjacent finishes, removed the wood flooring, and cleaned the subfloor.
Subfloor Check – We verified fasteners and flatness, then installed cement board with mortar and corrosion-resistant screws for a rigid base.
Layout & Dry-Fit – In a tight powder room, layout is everything; we centered tile to the most visible sightline and balanced cut sizes at walls and the toilet flange.
Set Tile – Using the appropriate trowel notch and directional troweling, we embedded the tiles in thinset for full coverage and lippage control.
Grout & Detail – After cure, we grouted with MAPEI for even color, tooled movement joints where needed, and re-installed fixtures and trim.
Final Clean & Walkthrough – We left the space spotless and reviewed care tips with the homeowner. Built to last, designed to impress.
Why Large-format Tile Works in a Small Powder Room
If you’re researching powder room flooring ideas or small bathroom floor tile, here’s why this choice shines:
Makes small rooms feel bigger – Fewer lines = a cleaner visual field.
Low maintenance – Less grout to clean.
Modern aesthetic – 24×24 tiles deliver that high-end, gallery-clean look.
Durability – Porcelain is dense, water-resistant, and ideal for splash zones.
Design Notes for Chestnut Hill Homes
✎ Coordinate with existing stone/vanity – Pull a grout tone from the countertop’s lightest or mid-tone fleck for cohesion.
✎ Sheen matters – A matte or lappato finish keeps traction high without sacrificing style.
✎ Threshold transitions – In older homes, plan a beveled marble or wood reducer that respects adjacent floor heights.
✎ Heat option – If you’re planning a full bathroom renovation later, consider underfloor heat for additional comfort.
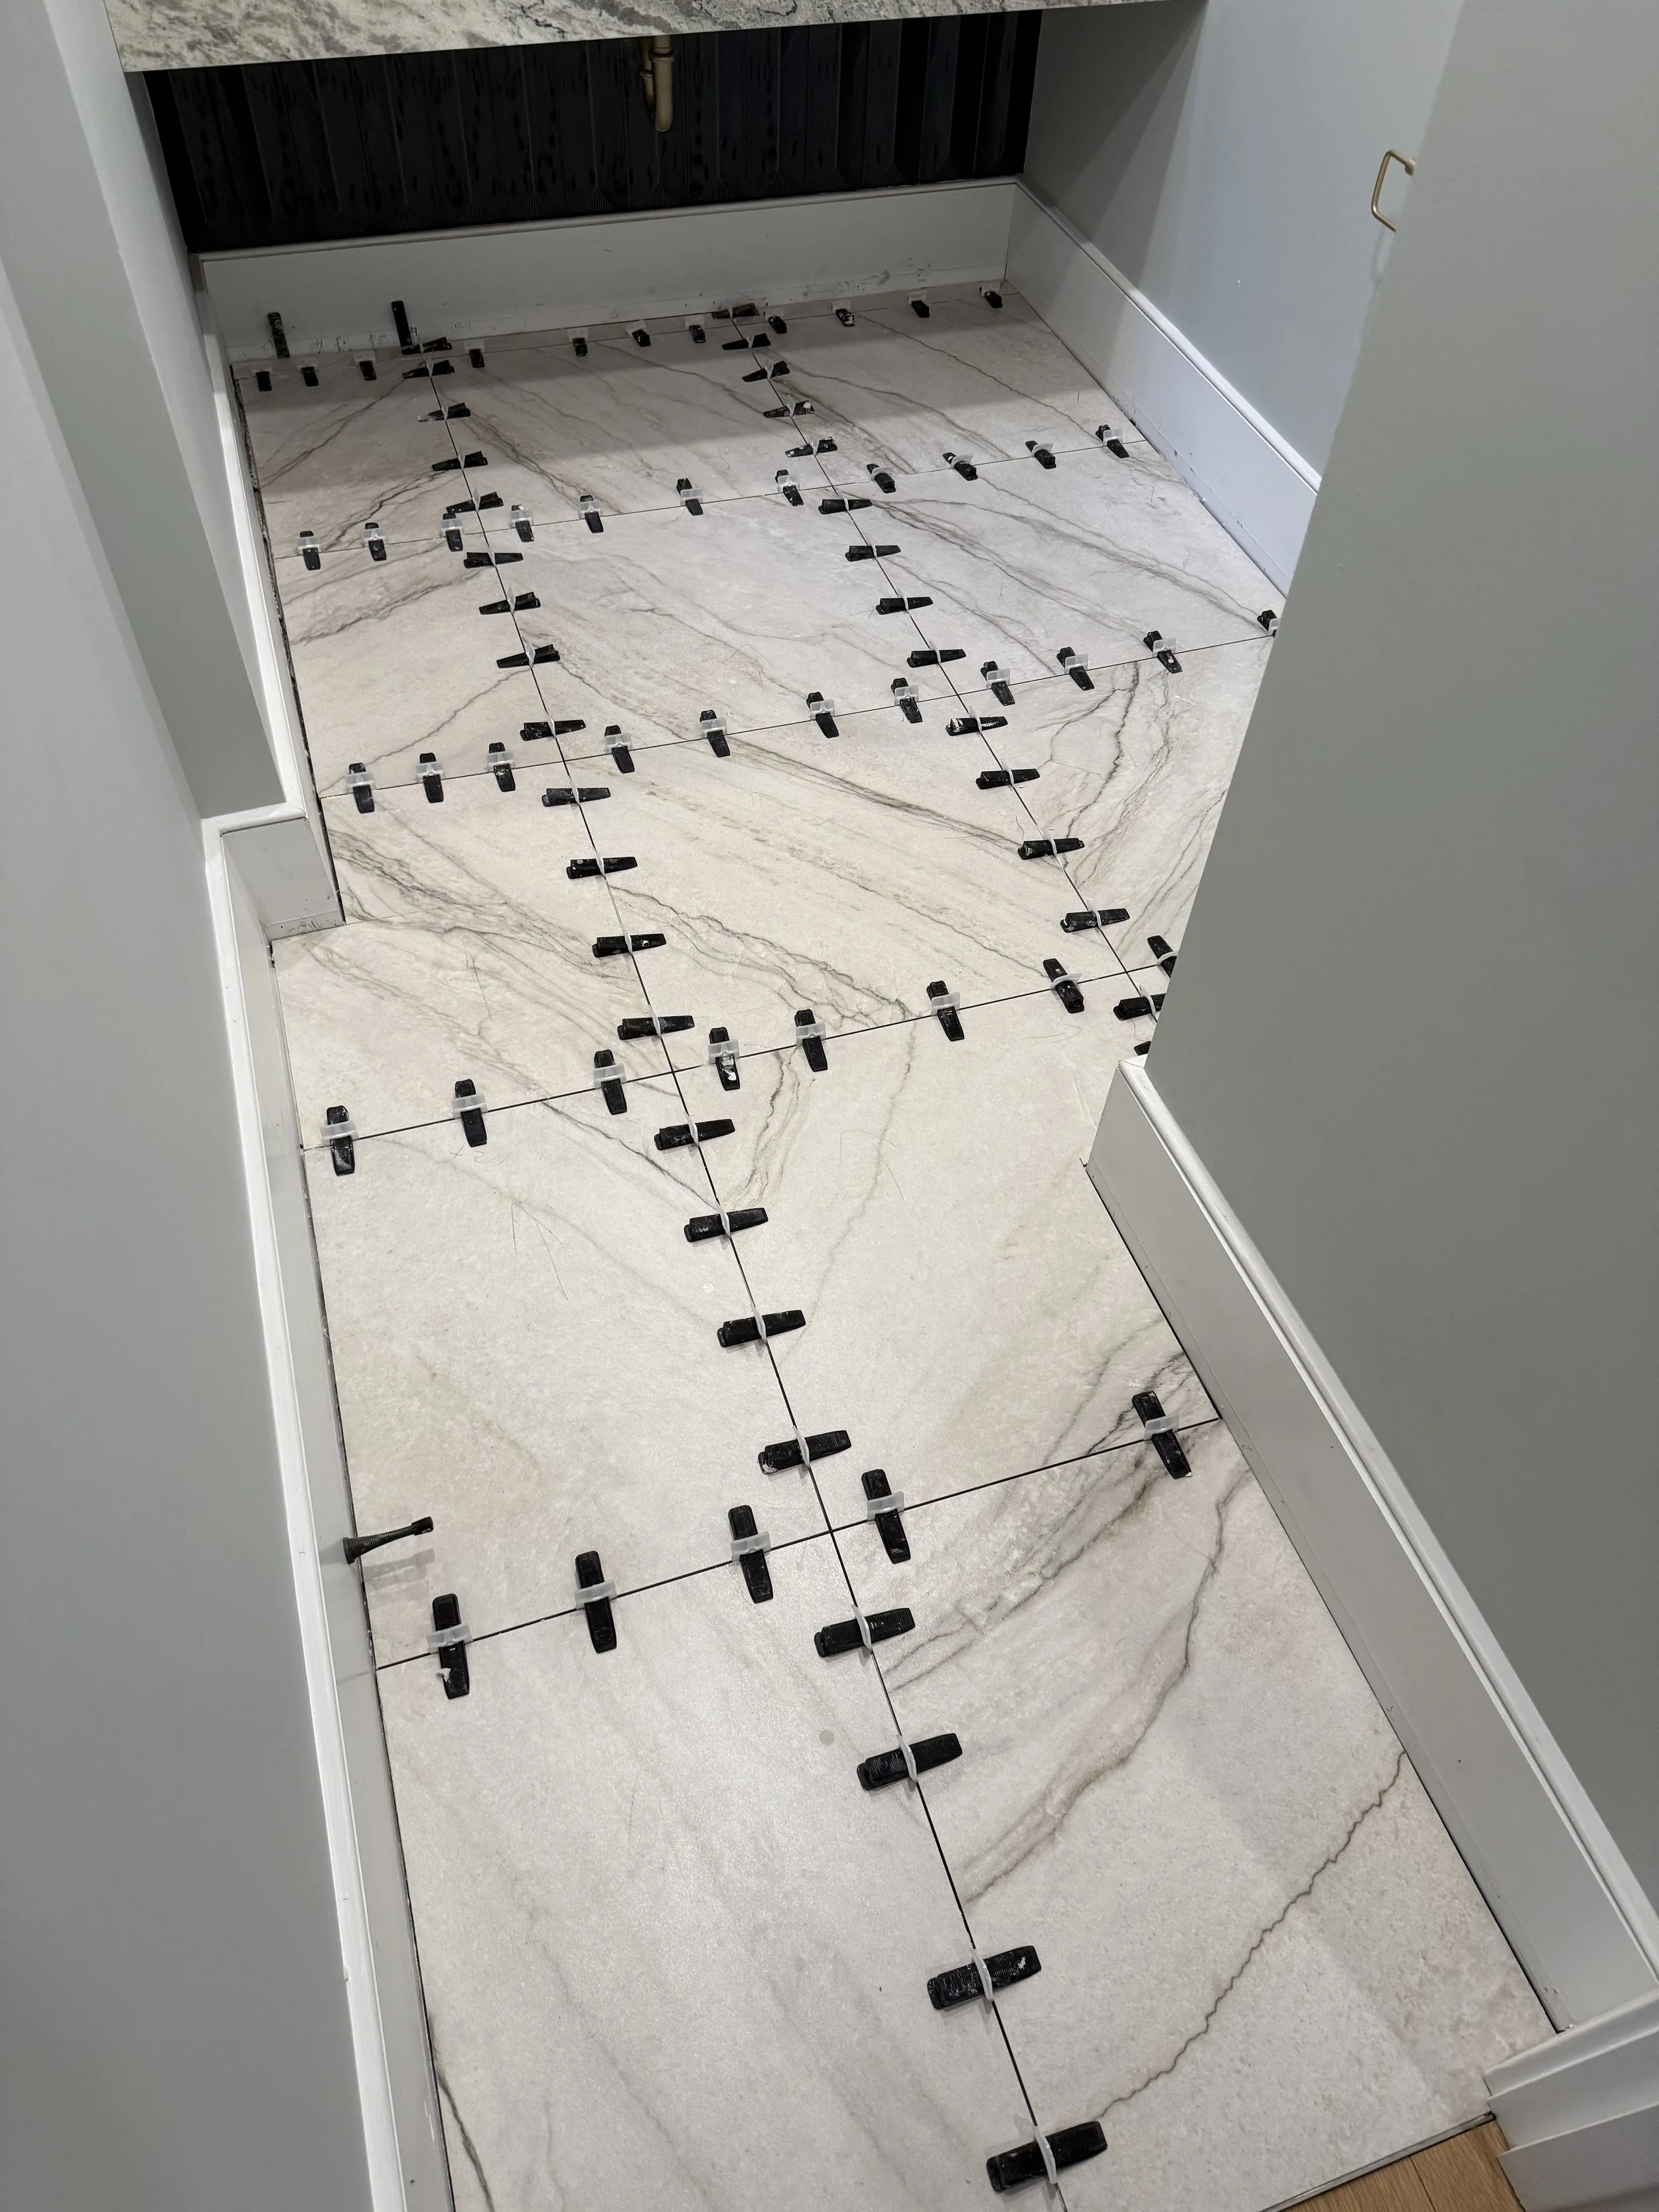
During

After
What the Homeowner Said:
“We had a hardwood floor removed and replaced with tile. Catalin and his crew were knowledgeable, neat and punctual. They are perfectionists and our powder room is outstanding. We would definitely recommend them.”
Visit Our Showroom To See These Exact Materials
You can see the tile and grout used in this project in person at our showroom. We’re just a short drive from Chestnut Hill and the Main Line, serving nearby communities around the Philadelphia suburbs.
Ready for your own update?
We offer free in-home estimates and straightforward recommendations that fit your space, timeline, and budget. Call or visit our showroom to start your powder room floor tile project.